Imagine this: You’re trying to check your WordPress website when, suddenly, you’re taken away to a suspicious gambling site or a sketchy pharmaceutical page.
Your heart sinks as you realize your site’s been hacked. 😱
We know exactly how terrifying and frustrating this situation can be. But first, take a deep breath.
Your website can be saved, and we’re here to guide you through every step of the recovery process. Whether your visitors are seeing spam redirects or you’re getting that dreaded “This site may be hacked” warning from Google, we’ve got you covered.
In this article, we’ll show you two proven ways to stop WordPress redirecting to spam websites.
Why Is My WordPress Site Redirecting to Spam?
Spam redirects happen when hackers inject malicious code into your WordPress site. This code then sends visitors to unwanted websites filled with ads, phishing scams, or malware.
Hackers can use different methods to gain access to your site, including:
- Infected Plugins & Themes: Plugins and themes downloaded from unauthorized sources (nulled WordPress themes and plugins) are a common cause of malware and spam redirects.
- Weak Passwords: Attackers can guess or steal weak admin passwords to take control of your site and insert malicious code that redirects users to spam sites.
- Unpatched Security Holes: If your WordPress core, plugins, or themes are outdated, then hackers can exploit known vulnerabilities to add malicious code.
- Hidden Backdoors: Even after removing visible malware, hackers sometimes leave hidden access points to reinfect your site later. These are called backdoors.
Many website owners don’t realize their site has been hacked until visitors start complaining or search engines issue a warning. The sooner you act, the less damage it will cause.
We will cover 2 methods in this article, and feel free to use the jump links below to go to the method you want to use:
Let’s begin with our recommended solution because it is easier for beginners, non-tech users, and small business owners.
Method 1: Use A Hacked Site Repair Service (Recommended 🎯)
When your site’s been compromised, time is of the essence. Every minute your website redirects to spam websites could mean lost visitors, damaged reputation, and potential Google penalties.
That’s why many site owners choose a professional repair service – it’s the fastest, safest way to get back online.
The Expert Solution:
For most WordPress users, the easiest way to clean spam redirects is by using our professional Hacked Site Repair Service.
For a one-time (non-recurring) fee, our team of WordPress security experts will clean your website and remove the malicious code redirecting to spam sites.
Our Hacked Site Repair Service offers several key benefits:
- Expert technicians who have handled thousands of hacked sites
- Emergency response & timely fixes
- Complete malware removal and security hardening
- Post-cleanup backup of your website
- No risk of accidentally damaging your site
The best part is that you get a 30-day guarantee and a full refund if we are unable to fix your WordPress website.
👉 Ready for expert help? Just visit our Hacked Site Repair Service page to get started.
Method 2: Fix WordPress Spam Site Redirects Manually (DIY Users)
If you’re comfortable with WordPress and prefer to handle things yourself, then we’ve created a comprehensive step-by-step guide.
We’ll walk you through each part of the cleanup process, explaining what to do and why it matters.
⚠️ Caution: While DIY fixes are possible, they can be risky if you’re not familiar with WordPress security. One wrong move could make the problem worse or lead to data loss.
ℹ️ Important: Create a Backup Restore Point
Before starting any repairs, make sure you have a recent backup of your site. If something goes wrong, then you’ll want a restoration point.
We recommend using Duplicator, which easily backs up and restores your website. We use it across our business, and it has been a game-changer for our secure backup needs. For more details, check out our complete Duplicator review.
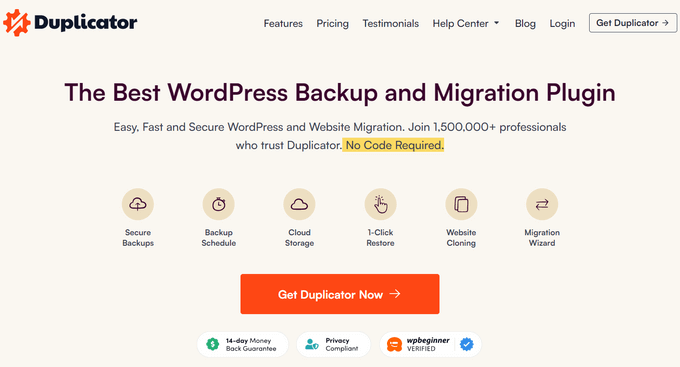
Note: A free version of Duplicator is also available. You can give it a try, but we recommend upgrading to a paid plan, which offers more features.
Now that you have prepared your website for repairs, let’s start fixing spam redirects.
Step 1: Scan Your Website for Malware
Think of malware scanning like using a metal detector at the beach – it helps you find hidden threats buried in your site’s files.
Our experience shows that spam redirects often hide in unexpected places, making a thorough scan essential.
Luckily, there are excellent WordPress security plugins available that you can use to scan your website.
Here’s how to run an effective malware scan.
First, you need to install a trusted security plugin (like Sucuri Security or Wordfence). For the sake of this article, we will show you how to run a scan in Wordfence, but the instructions work the same regardless of which security plugin you are using.
First, you will need to install the security plugin of your choice. For details, see our guide on how to install a WordPress plugin.
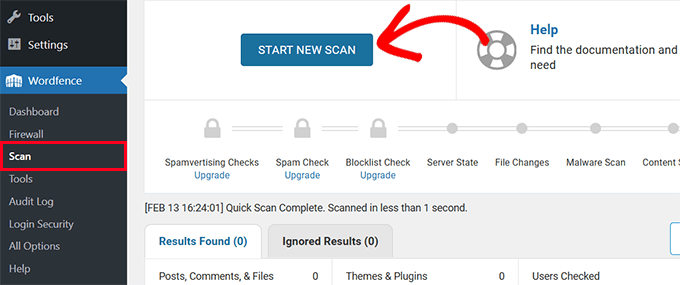
Next, under the plugin menu, navigate to the Scan section and run a comprehensive site scan. It can take some time to complete the scan depending on how much data and files you have stored.
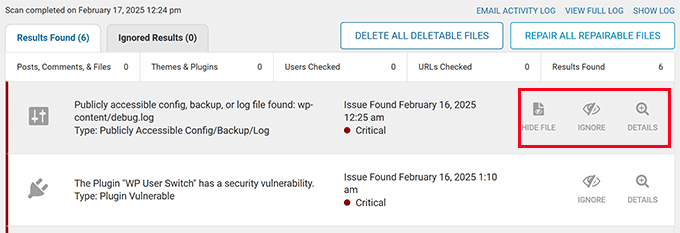
Once that’s finished, you will see the scan results.
Review the results carefully and look for severe, critical, and other issues. You can click on an issue to view its details.
Here, most security plugins will also provide you with instructions on how to address that issue.
WordPress security scanners are quite good at catching some of the most notorious malware and redirect hacks. Hopefully, they will be able to find the code responsible for spam redirects.
💡 Pro tip: Don’t rely on just one scanner. Different security tools can catch different types of malware. We recommend using at least two different scanning solutions.
Step 2: Check for Suspicious Admin Users
Hackers often create hidden administrator accounts to maintain access to your site. These accounts might have innocent-looking usernames or be disguised as system accounts.
We’ve seen cases where hackers created a single cleverly disguised admin user account. We have also seen cases where the malware created dozens of admin accounts.
Just follow these steps to identify and remove suspicious users.
Go to the Users » All Users page in your WordPress admin dashboard.
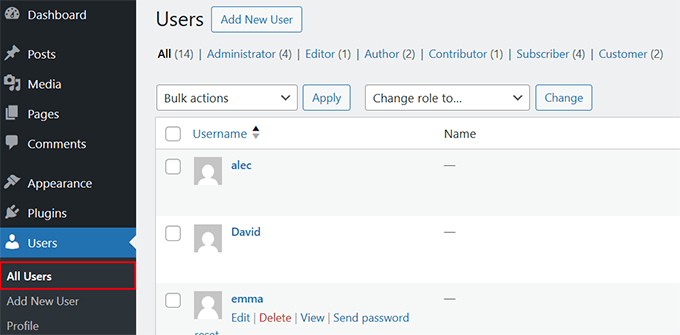
Here, you need to look for accounts you don’t recognize. These could be accounts with random numbers or strange usernames or accounts pretending to be system accounts.
Next, it’s time to remove any suspicious accounts immediately by clicking ‘Delete’ under that account.
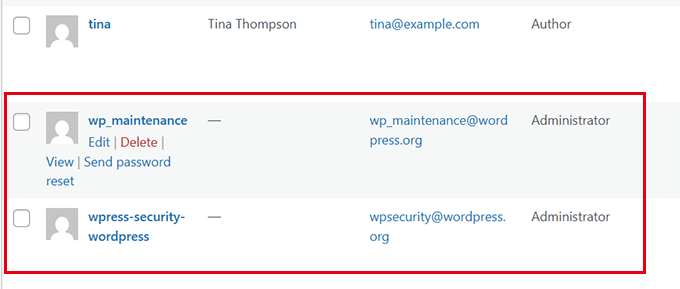
⚠️ Warning: Some hackers name their accounts after common WordPress roles like “admin_support” or “wp_maintenance”. Be extra vigilant with system-looking usernames.
Once you have reviewed and deleted suspicious user accounts, you can move on to the next step.
Step 3: Replace Hacked WordPress Files
Just like replacing a virus-infected hard drive with a clean one, we need to restore clean versions of core WordPress files.
Don’t worry – this won’t affect any of your website content, images, themes, or plugins.
Here’s our tested process for safe file replacement.
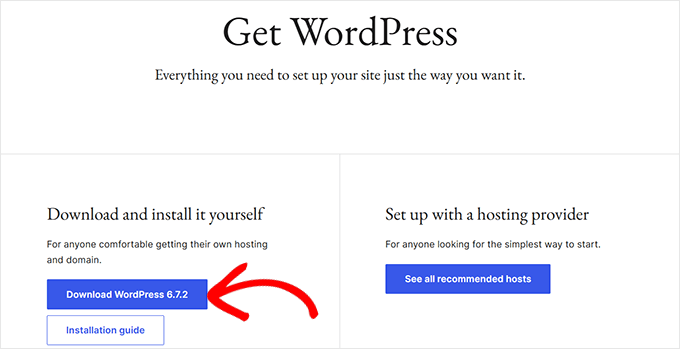
First, you need to download a fresh copy of WordPress from WordPress.org and unzip the file on your computer.
Next, connect to your site using an FTP client or File Manager app in cPanel and navigate to the WordPress root folder.
This is the folder where you will be able to see the wp-admin, wp-includes, and wp-content folders.
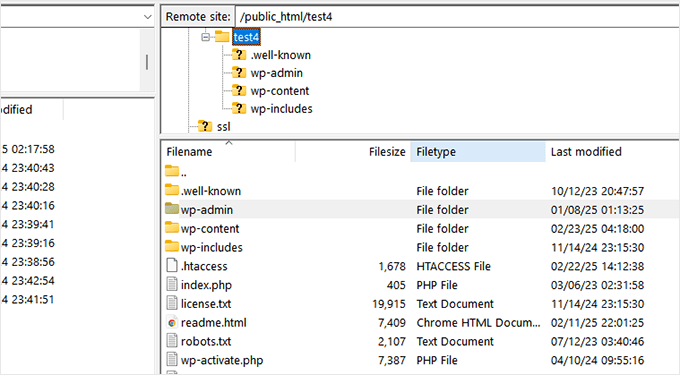
Now, go ahead and delete the existing wp-admin and wp-includes folders.
Once they are deleted, you need to upload the clean versions from your computer.
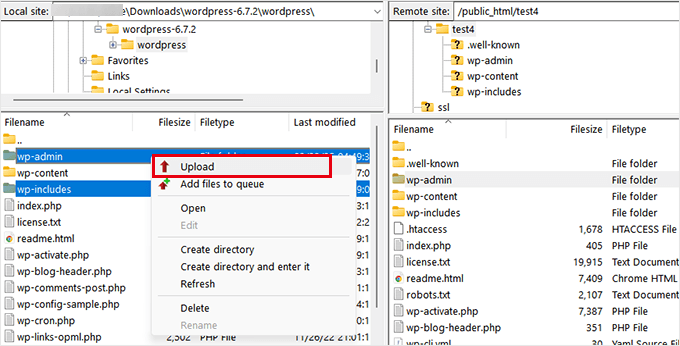
After replacing the main folders, you need to replace all core files in the root directory. This includes files like wp-activate.php, wp-blog-header.php, wp-comments-post.php, wp-config-sample.php, and more.
When prompted, select ‘Overwrite’ to replace old files with the new version.
Next, you need to download the wp-config.php file to your computer as a backup and delete the .htaccess file from your root folder. Don’t worry because WordPress will automatically regenerate the .htaccess file for you.
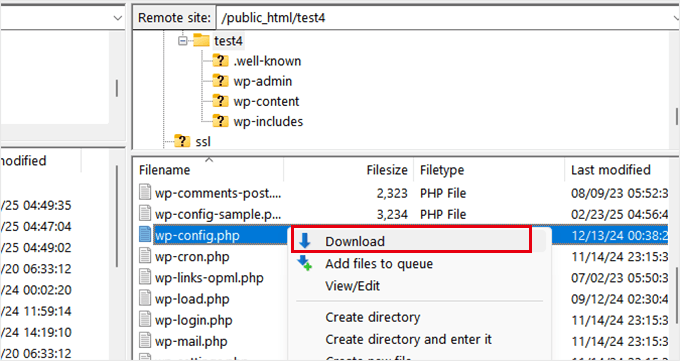
Now, you have to rename the wp-config-sample.php file to wp-config.php and then right-click to ‘Edit’ it. The file will open in a text editor like Notepad or TextEdit.
Carefully fill in the values for the database connection. You can see the old wp-config.php file that you downloaded in the earlier step to find out your WordPress database, table prefix, username, password, and hostname.
For more details, see our guide on editing the wp-config.php file.
Once you have finished replacing the old core files with fresh copies, don’t forget to visit your website and admin dashboard to make sure everything is working as expected.
After that, you can move on to the next step.
Step 4: Remove Malicious Code from Theme & Plugin Files
One of the common sources of malware is nulled plugins and themes. These are pirated copies of premium WordPress plugins and themes downloaded from unauthorized sources.
Hackers love hiding malicious code in theme and plugin files. They often inject their spam links and redirects into legitimate files, making them harder to spot. But don’t worry – we’ll show you exactly what to look for.
⚠️Warning: Most WordPress theme and plugin settings are stored in the database and will remain there even if you delete those files. However, sometimes, you may lose settings or custom changes you made to those files. In that case, you will need to manually restore those changes.
Just follow this process to clean your plugin and theme files.
First, you need to download fresh copies of all your themes and plugins from trustworthy sources. For free themes and plugins, the trusted source is the WordPress.org website itself. For premium themes and plugins, you will want to download them from official websites.
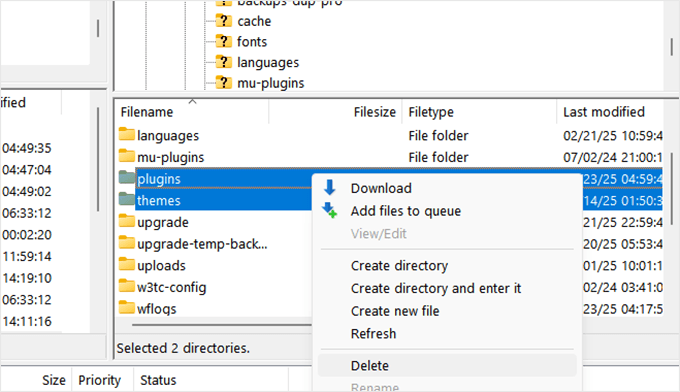
Once you have downloaded all the plugins and theme files, connect to your website using an FTP client and navigate to the wp-content folder.
Now, you need to delete the themes and plugins folders from your website. Once they are deleted, create new directories and name them ‘themes’ and ‘plugins’. You will now have empty themes and plugins folders on your website.
You can now start uploading the theme and plugin files you downloaded earlier. You will need to unzip each downloaded file before you can upload them to your website.
Once you have uploaded all the files, go to your WordPress admin area in the browser and activate the theme and plugins you were using before. If you see an error, then you may need to try uploading that particular theme or plugin file again.
Replacing theme and plugin files with newer versions downloaded from authentic sources will clean them.
Hopefully, by now, your website will be clean of any spam redirects. However, to ensure your website remains secure, you will need to tighten its security.
Step 6: Securing WordPress After Cleaning Up Spam Redirects
Security is not a one-time thing. Instead, it is an ongoing process.
Now that you have cleaned and fixed the spam redirects, the next step is to ensure your website remains clean going forward.
To do that, you need to perform some additional security hardening on your website.
1. Change All Website Passwords
Passwords play an important role in WordPress security. If you believe your website was hacked, then you need to immediately change all your passwords related to your website.
This includes the following:
- All user accounts on your WordPress website. See our guide on changing passwords for all users in WordPress.
- Passwords for all FTP accounts on your website. You can find FTP accounts in your WordPress hosting control panel, and you can manage their passwords there.
- Passwords for your WordPress database username. You can find MySQL users in your hosting account control panel under the Database section. You must update the password for the database username in your
wp-config.phpfile as well. Otherwise, your website will start showing the error connecting to the database error.
💡Pro Tip: Always use stronger passwords and a password manager app like 1Password to store all your passwords.
2. Install a Security Plugin and a WordPress Firewall
Now that we’ve cleaned up the hack, it’s time to strengthen your site against future attacks. Think of this step as installing a high-tech security system for your WordPress site.
Here’s our recommended security setup:
- Install a WordPress security plugin like Sucuri or Wordfence (both have excellent free versions).
- Set up a WordPress firewall that runs on the cloud. We recommend using the Cloudflare free CDN, which automatically blocks any suspicious activity even before it reaches your website.
We use Cloudflare on WPBeginner. You can read about our experience in our case study on switching to Cloudflare.
The combination of a WordPress security plugin that runs on your website and a cloud-based firewall strengthens your WordPress security to a professional level. It is capable of blocking the most common malware, DDoS attacks, and brute force hacking attempts.
Bonus Tips: Prevent Future WordPress Hacks
The best way to deal with hacks is to prevent them from happening in the first place. After helping countless users recover their sites, we’ve developed a solid prevention strategy.
You can read them all in our complete WordPress security handbook. It is a step-by-step security setup we use on all our websites, written specifically for beginners and small businesses.
Here are our top security practices:
- Set up automated WordPress backups.
- Keep WordPress core, themes, and plugins updated.
- Set up two-factor authentication in WordPress.
- Limit login attempts to prevent brute force attacks.
These tips are quick and easy to implement. They will protect you from malicious spam URL redirect attacks in the future.
Final Words: Securing WordPress From Spam Redirects and Malware
Dealing with spam redirects can be scary, but you’ve now got all the tools and knowledge needed to fix your site.
Whether you choose our Hacked Site Repair service (Recommended) or follow the DIY guide, you’re taking the right steps to secure your WordPress website.
Remember, security isn’t a one-time fix – it’s an ongoing process. By using the prevention tips we’ve shared, you’ll be much better protected against future attacks. 💪
You may also wish to read our article on how to tell if a WordPress security email is real or fake or how to secure WordPress multisite.
If you liked this article, then please subscribe to our YouTube Channel for WordPress video tutorials. You can also find us on Twitter and Facebook.
The post How to Stop WordPress Redirecting to Spam Websites (Quick Fix) first appeared on WPBeginner.
Post a Comment