
Do you want to add an event calendar to your WordPress website?
There are lots of different plugins and calendar apps that can do this, but some are much too complicated or don’t work very well with WordPress.
In this article, we’ll show you how to easily create a simple event calendar in WordPress with Sugar Calendar.

How to Create a Simple Event Calendar with Sugar Calendar
Sugar Calendar is a simple and lightweight events calendar plugin for WordPress built by Pippin Williamson and the team behind Easy Digital Downloads.
Since we were looking for a lightweight event calendar plugin, we decided to give Sugar Calendar a try, and found it quite easy to use.
Here’s how to create an event calendar in WordPress with Sugar Calendar.
First thing you need to do is install and activate the Sugar Calendar plugin on your website. For more details, see our step by step guide on how to install a WordPress plugin.
Upon activation, go to the Calendar » Settings page in your WordPress admin. Here, you need to enter your license key. You will find this in your account area on the Sugar Calendar website.
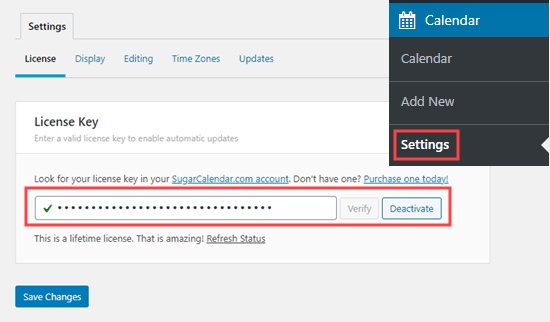
Once you’re done, click the Save Changes button to make sure your license key is saved.
Creating a Calendar in Sugar Calendar
Sugar Calendar divides the functionality into two main sections: Calendars and Events.
You can create multiple calendars, and then add different events or actvities to each calendar accordingly.
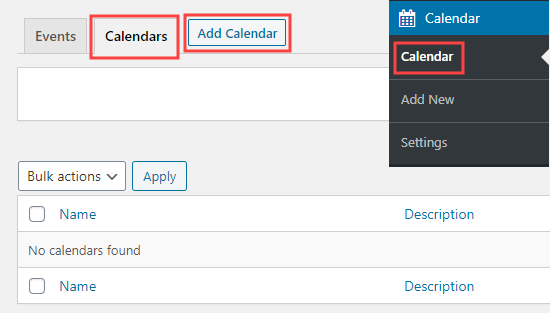
To get started, click on the ‘Calendar’ menu item page in your WordPress admin sidebar. After that, you need to select the Calendar tab then click on the ‘Add New Calendar’ button to create a new calendar.
You will then see a popup box for adding your new calendar.
You need to give your calendar a name and a ‘slug‘ which will become the end part of the calendar’s URL (web address).

There’s a box where you can describe your calendar. The description is optional, and you can leave it blank if you want.
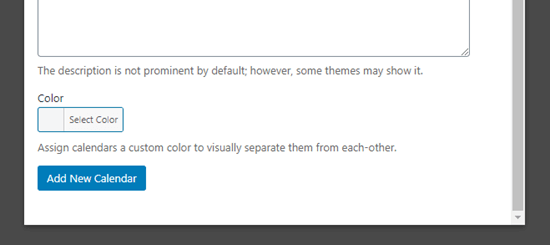
Below the description, you can select a color for your calendar. This is very useful if you’re creating multiple calendars because this will make it easier to identify different calendars on your WordPress website.
If you’re just creating one calendar, then you don’t need to set a color.
When you’re done, click the ‘Add New Calendar’ button to create your calendar.
Adding Events in Sugar Calendar
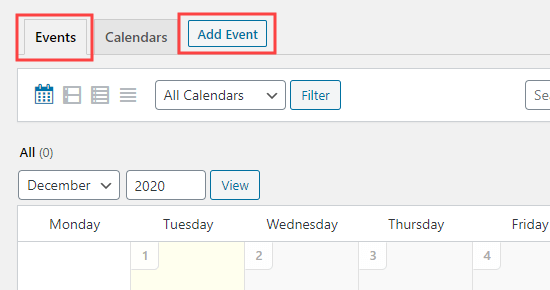
Now, it’s time to add some events to your calendar. Just click on the Events tab then click the ‘Add Event’ button to create your first event.
The ‘Add New Event’ screen has space for all the information about your event. Go ahead and enter the name for your event at the top.
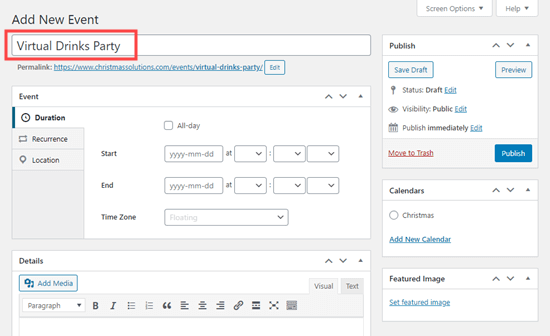
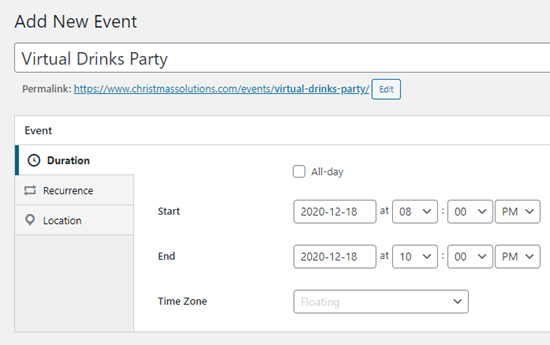
Below this, you can set the start time and end time for your event.
Your event can be on a single day or across multiple days. If it’s an all-day event, then simply check the ‘All-day’ box.
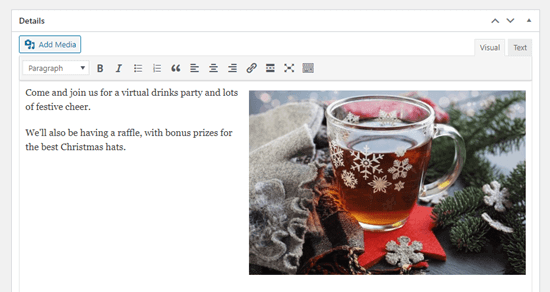
Next, go ahead and add more information about your event in the Details box. If you would like to include images or photos here, go ahead and add those using the ‘Add Media’ buttons.
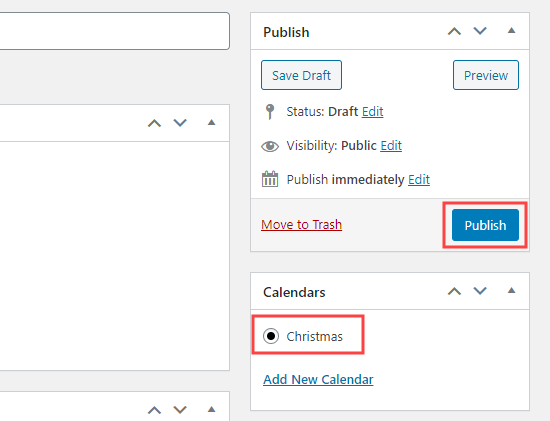
On the right-hand side of the screen, you need to click on the calendar that you want to add your event onto. You can also create a calendar here if you haven’t done so already.
When you’re ready, go ahead and click the Publish button.
You can repeat this process to add more events to your calendar.
Putting Your Events Calendar on Your Website
You can add your calendar to any page or post on your website. You can even use the Sugar Calendar widget to add it to your sidebar.
We’re going to add our calendar to a new page on our demo site.
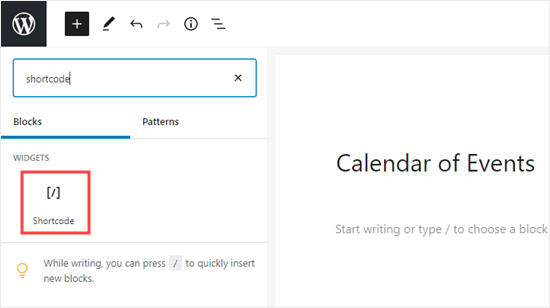
First, go to Pages » Add New. Then, enter a title for your page and add a shortcode box to your page.
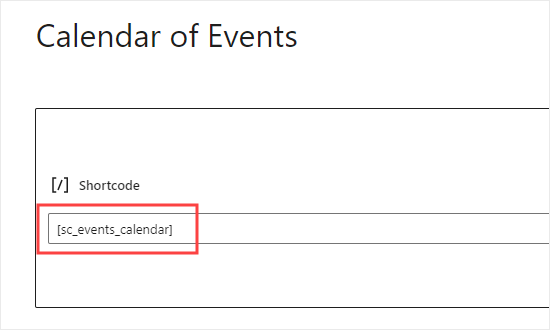
Next, copy the shortcode [sc_events_calendar] into the shortcode block.
Now, it’s time to preview or publish your page. You will then see the calendar of events on your website.
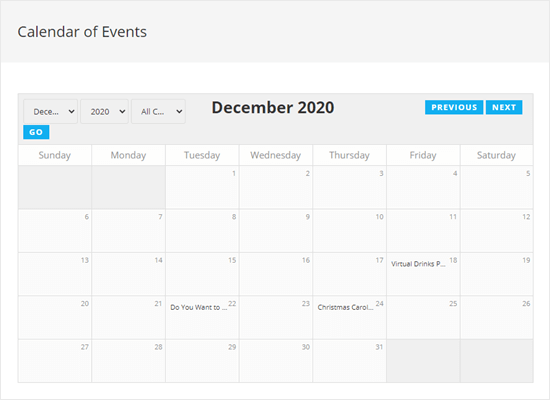
Visitors on your website can click on an event to see the full details.

Note: This events page will use the fonts, colors, etc from your theme. That means it will match the posts and pages on your blog.
We hope this article helped you learn how to create a simple event calendar with Sugar Calendar. You might also like our article on the best email marketing services and best push notification software, so you can keep your users updated about new events and activities.
If you liked this article, then please subscribe to our YouTube Channel for WordPress video tutorials. You can also find us on Twitter and Facebook.
The post How to Create a Simple Event Calendar with Sugar Calendar appeared first on WPBeginner.
Post a Comment