Recently, one of our readers asked what they could do to fix the DNS_PROBE-FINISHED_NXDOMAIN problem?
This error message appears in Chrome when your browser can’t connect to the website you’ve requested. Other browsers use different messages to display this error.
In this article, we’ll show you how to easily fix the DNS_PROBE_FINISHED_NXDOMAIN error, and how to avoid it in the future.

What Is the DNS_PROBE_FINISHED_NXDOMAIN Error?
The DNS_PROBE_FINISHED_NXDOMAIN error is a Google Chrome error message which appears when the browser is unable to find the website you are trying to access.
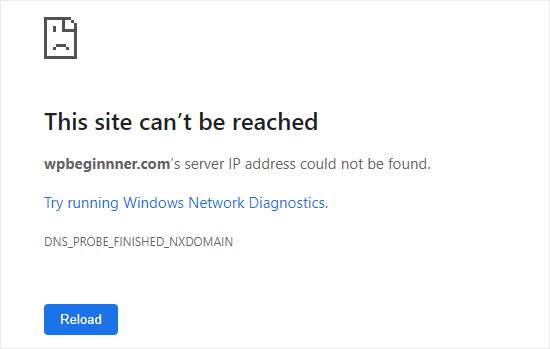
This error appears when the DNS (Domain Name System) cannot find or connect to the IP address for that website.
Your browser then assumes that the website domain name doesn’t exist. The NXDOMAIN part of the error stands for ‘non-existent domain.’
To understand more, please take a look at our guide on how domain name / DNS work (visual explanation).
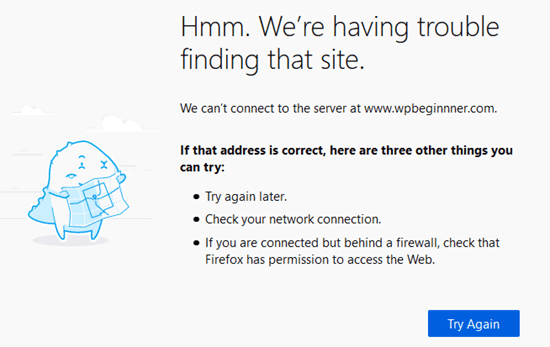
The error looks different in other browsers. For instance, here’s how it looks in Firefox:
If you’re seeing this error when you try to access your own WordPress site, you may think there’s a problem with your site.
The good news is that your site is likely working fine. The problem is that your computer isn’t able to connect to it.
With that said, let’s see how to troubleshoot and fix this error.
How to Fix the DNS_PROBE_FINISHED_NXDOMAIN Error?
There are several ways to fix the DNS_PROBE_FINISHED_NXDOMAIN error. However, it’s important to first check that it really is an error.
Before doing anything else, you should check that you typed the domain name correctly.
For instance, if you accidentally typed incorrect spelling for a domain name, then your browser may not be able to find that domain and give this error.
Even if you clicked on a link, you should still check that the domain name is correct. It could have been mistyped by whoever created the link.
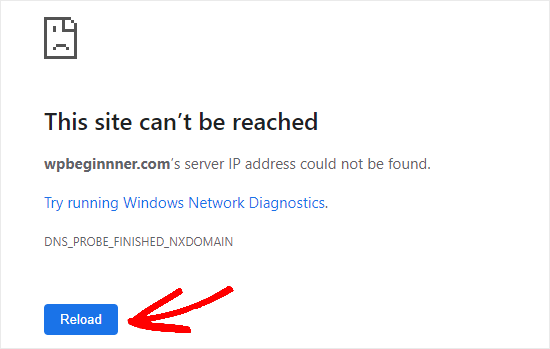
If you’re certain that the domain name is correct, then click the ‘Reload’ or ‘Try again’ button.
Next, you should try accessing the website from a mobile phone (4G network), so you can see whether the issue is with your device or WIFI connection.
If the website doesn’t load on your mobile phone either, then you need to immediately contact your WordPress hosting provider because this means that your website is down.
However if the website loads just fine on your mobile phone, then you know the issue is either with your computer or your WiFi connection.
Let’s try solving that.
The first thing you should try is restarting your computer. If that doesn’t help, turn your internet modem off and on. These steps may automatically clear DNS and network-related issues.
If the error is still appearing, then you may need to try the following methods. We recommend starting with the first one and working through them.
- Clear Your Browser’s Cache
- Turn Off Experimental Chrome Features
- Flush Your Computer’s DNS Cache
- Release and Renew Your IP Address
- Use Google’s Public DNS Servers
- Check Your Computer’s ‘hosts’ File
Clear Your Browser’s Cache
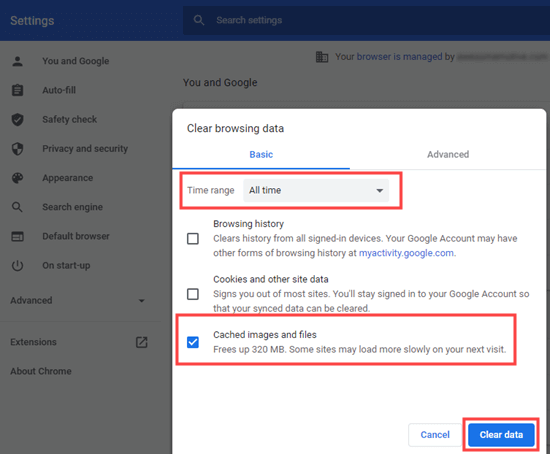
To clear your cache in Chrome, go to the page chrome://settings/clearBrowserData in your browser. This should give you a popup window where you are able to clear your cache.
First, set the time range to ‘All time’ then check just the ‘Cached images and files’ box. Next, click the ‘Clear data’ button.
If you aren’t using Chrome, check out our article on clearing your browser cache for instructions for all major browsers.
Now, try the website again. If it still shows the error message DNS_PROBE_FINISHED_NXDOMAIN, simply try the next solution.
Turn Off Experimental Chrome Features
If you’ve enabled any of Chrome’s experimental features, then these could be causing the DNS_PROBE_FINISHED_NXDOMAIN error.
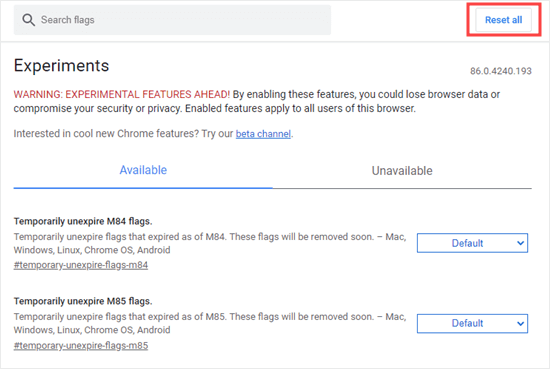
To turn these off, go to chrome://flags/ in your browser then click the ‘Reset all’ button at the top.
If the website you want to access still shows the error, try the next solution.
Flush Your Computer’s DNS Cache
Your computer often saves (caches) the IP addresses of websites that you’ve previously visited. If the website’s IP has changed, then that can cause the DNS_PROBE_FINISHED_NXDOMAIN error.
Here’s how to flush your DNS cache.
Note: These instructions are for Windows 10. For macOS instructions, check out our guide on clearing your DNS cache.
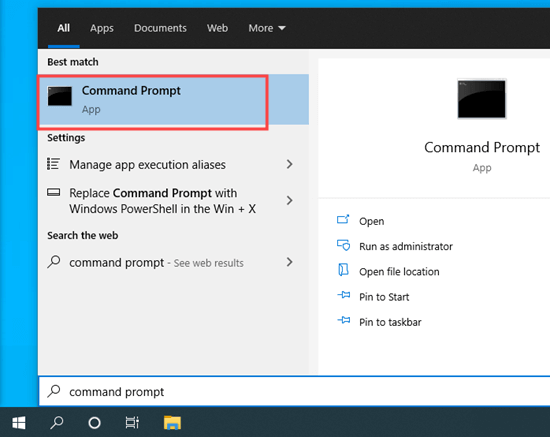
First, search for the Command Prompt app. Go ahead and open it up.
Tip: If you’re not logged in as an administrator, use the ‘Run as administrator’ option.
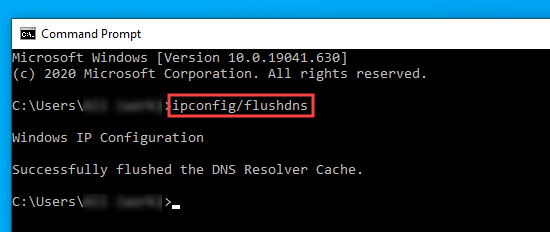
Next, type ipconfig/flushdns then press Enter on your keyboard. You should then see a success message.
Now, try accessing the website again. If the error message DNS_PROBE_FINISHED_NXDOMAIN still appears, try the next solution.
Release and Renew Your IP Address
The next step is to renew your computer’s IP address on the internet.
Go ahead and open up the Command Prompt app, as shown in the previous step. Next, enter the following commands in this order. Press Enter after each one.
ipconfig /release
ipconfig /flushdns
ipconfig /renew
You will see quite a few lines of information after entering the first and third commands. This is normal.
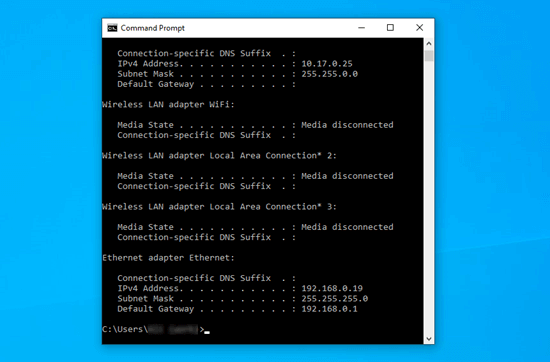
If the DNS_PROBE_FINISHED_NXDOMAIN error still appears after this, try the next solution.
Use Google’s Public DNS Servers
By default, your computer uses the DNS server from your internet service provider (ISP). You can change this to use Google’s public DNS server instead.
On Windows, open your Control Panel then go to Network and Internet » Network and Sharing Center. Then, click the ‘Change adapter settings’ link on the left hand side.
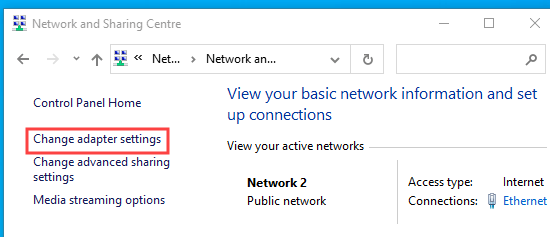
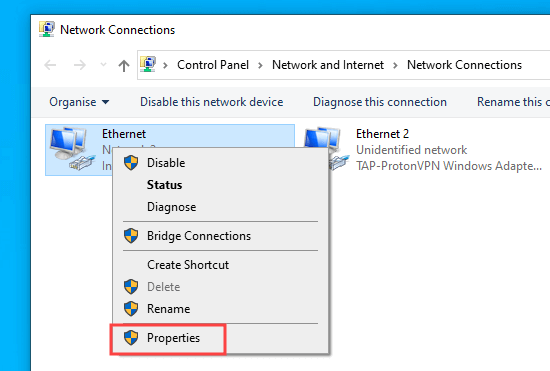
You will see a list of connections. Right-click on your current connection and select the Properties option.
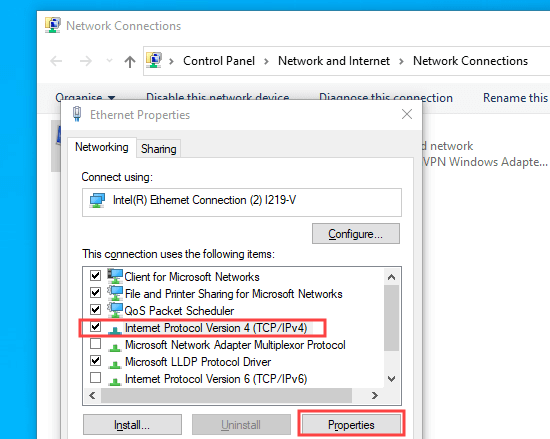
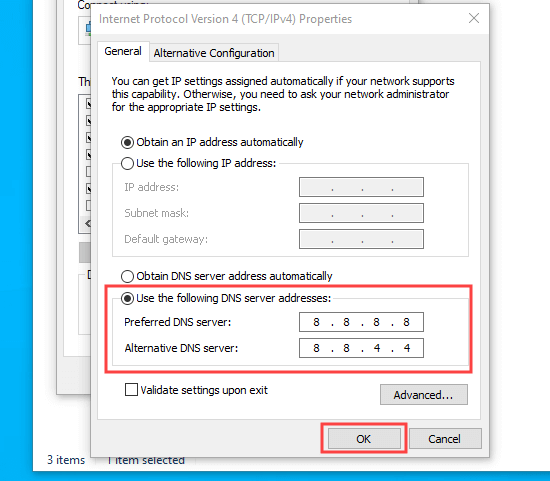
Next, click on the Internet Protocol Version 4 (TCP/IPv4) and then click the Properties button.
After that, you need to click the ‘Use the following DNS server addresses’ option and enter these DNS servers:
Preferred DNS server: 8.8.8.8
Alternative DNS server: 8.8.4.4
Then, click the OK button to save your changes.
Try the website again to see if the DNS_PROBE_FINISHED_NXDOMAIN error is fixed. If not, try the final method.
Check Your Computer’s ‘hosts’ File
The hosts file is a file that your computer uses to map domain names to IP addresses. If the website is incorrectly recorded in this file, that can be the cause of the DNS_PROBE_FINISHED_NXDOMAIN issue.
On Windows, you can find this file through File Explorer. First, open File Explorer, then find the Windows folder on your computer. It’s normally in the C:\ drive. Mac users can find the file under /private/etc/hosts/ folder.
Next, go to System32 » drivers » etc. Here, you need to locate the hosts file and double click on it to open it. If you’re prompted to choose an app, use Notepad.
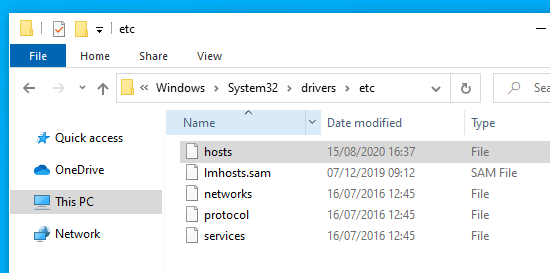
Now, check to see if the website’s address is in the hosts file. If it is, delete it along with the IP address next to it. Then, save the file.
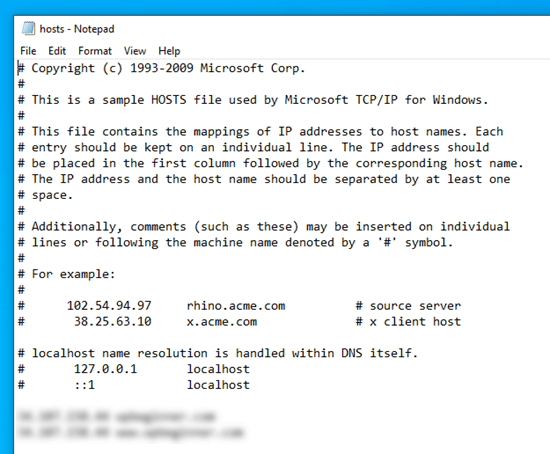
After doing this, the DNS_PROBE_FINISHED_NXDOMAIN error should hopefully no longer appear for that site.
We hope this article helped you learn how to fix the DNS_PROBE_FINISHED_NXDOMAIN error. You might also like our article on the most common WordPress errors and how to fix them.
If you liked this article, then please subscribe to our YouTube Channel for WordPress video tutorials. You can also find us on Twitter and Facebook.
The post How to Easily Fix the DNS_PROBE_FINISHED_NXDOMAIN Error appeared first on WPBeginner.
Post a Comment