Recently, one of our readers asked us how they could create a popup with Yes/No buttons?
Perhaps you’ve seen these used in an email list optin, or another special offer on a big website. These multi-step Yes / No campaigns can be very effective in improving your conversion rate.
In this article, we will show you how to create a Yes/No optin for your WordPress site.

What Is a Yes/No Optin and Why Use One?
A Yes/No optin is a popup form that has 2 options, either buttons or links. You can click the ‘Yes’ to opt-in, or click ‘No’ to refuse the offer.
Sometimes these are called 2-step optins or multi-step optins, as they involve the user taking 2 steps instead of 1.
Here’s an example of a Yes/No optin from Advanced Coupons:
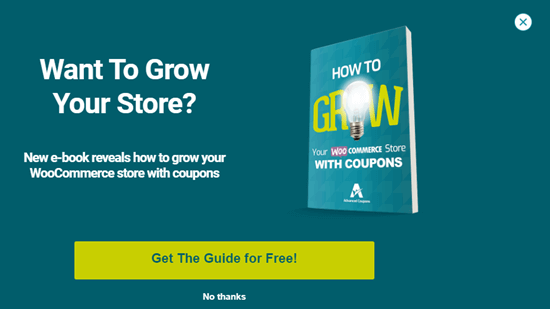
Note: The options don’t necessarily need to have ‘Yes’ and ‘No’ labels.
It might seem strange to get users to go through an extra step before they can join your email newsletter or take some other action.
However, Yes/No popups can be highly effective. This is because they use a special psychological tactic called the Zeigarnik Effect.
The Zeigarnik Effect is the principle that when someone starts a process, they’re likely to finish it. In this case, that means that someone who clicks Yes is likely to go ahead and put in their email address.
Plus, a Yes/No optin gives your visitors a choice. That feeling of freedom is powerful. It makes it more likely that your visitors will make the positive choice to opt-in to your list.
Even better, you can use the ‘No’ option effectively, too. For instance, you could create an optin like this one from WP Mail SMTP. It appears if a user looks like they’re about to leave the WP Mail SMTP site’s pricing page:
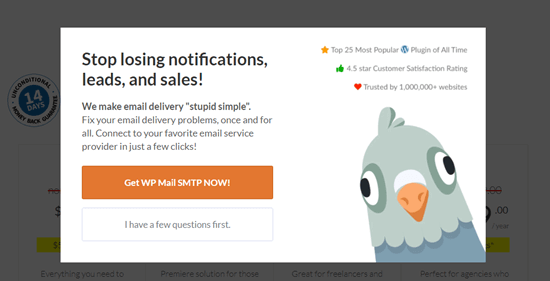
If the user clicks the ‘Get WP Mail SMTP Now’, then they stay on the pricing page. If they click ‘I have a few questions first’, then they’re directed to the Contact page. Here, they can easily contact your sales or support team, which may ultimately lead to successful conversion.
Creating a Yes/No Popup for Your Website
We’ll be using OptinMonster to create a Yes/No optin popup.
OptinMonster is the best lead generation software that helps you convert website visitors into customers and subscribers. It allows you to create beautiful popups, countdown timers, slide-in forms, and more to nudge users in the right direction”
Setting Up OptinMonster and Creating a New Campaign
First, sign up on the OptinMonster website. You will need the Pro plan or higher in order to create Yes/No optins.
Then, you need to install and activate the OptinMonster WordPress plugin. This lets you connect your WordPress site with your OptinMonster account.
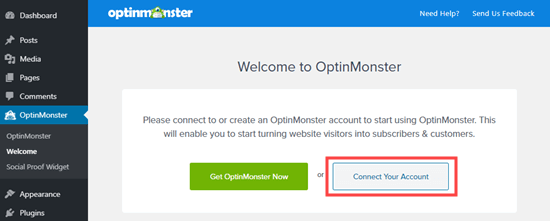
Upon activation, you will see the OptinMonster welcome screen. You need to click the ‘Connect Your Account’ button and follow the onscreen prompts. Then, your WordPress site will be connected to your OptinMonster account.
Now, go to the OptinMonster » Campaigns page in your WordPress admin. Simply click the ‘Create New Campaign’ button at the top to make a new campaign.

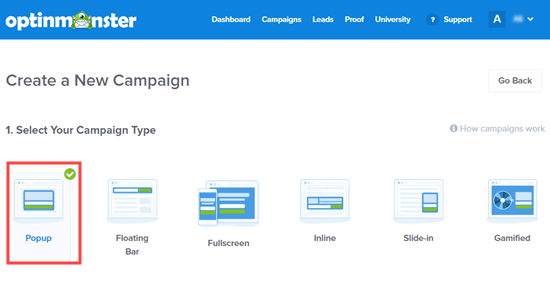
You will be taken straight into the OptinMonster app. We’re going to use a Popup for our optin. You can pick a different Campaign Type if you want.
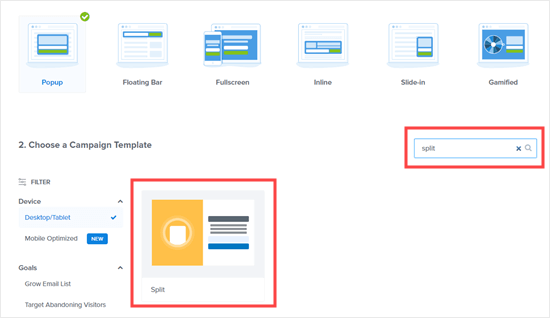
Next, select the template you want to use for your campaign. We’re going to use the Split template:
You’ll be asked to give your campaign a name and choose which site you want to show it on.
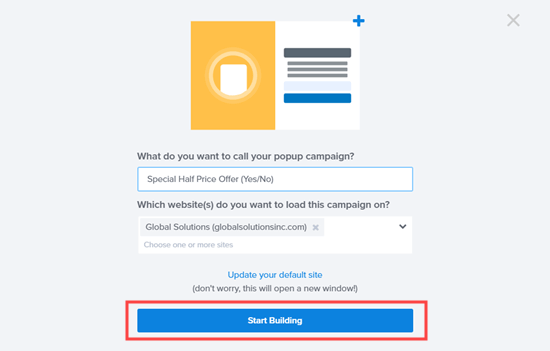
Once you are ready, go ahead and click on the ‘Start Building’ button.
Your chosen template will now open up in the OptinMonster campaign editor.
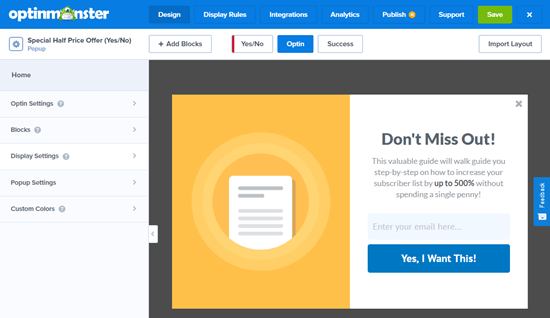
Editing Your Yes/No Optin in OptinMonster
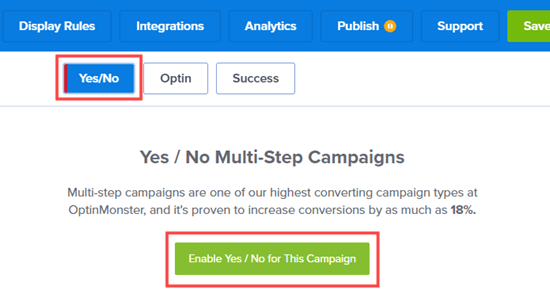
First, you need to create a Yes/No campaign. Simply click on the Yes/No tab near the top of your screen then click the ‘Enable Yes/No for This Campaign’ button:
This is a new part of your campaign. It will have a main button with a ‘No Thanks’ option below it:
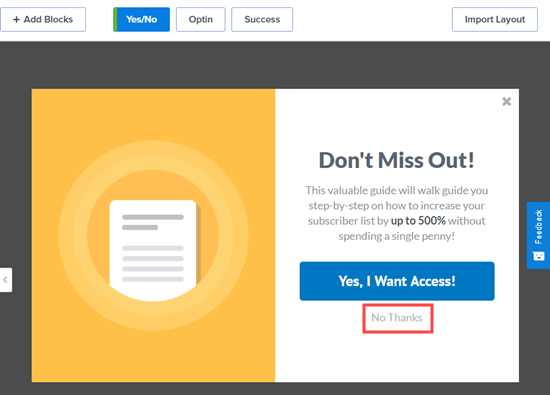
Note: Some templates will not have a built-in Yes/No view. With these, you will instead get a blank canvas to create your Yes/No view.
Go ahead and edit the Yes/No view as much as you want. Simply click on the part of the template you want to change. We are going to edit the header text:
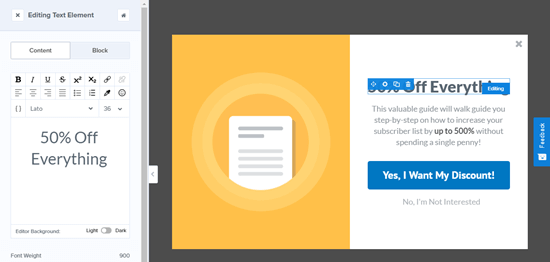
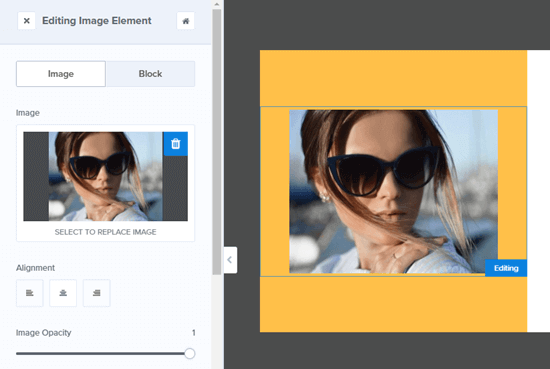
It’s easy to edit the image. Just click on it and then upload the image you want to use:
You may also want to change the Yes and No buttons. Simply click on them to edit the buttons. It’s easy to change their text, color, and more.
Just make your changes in the left-hand pane and the preview of your optin will automatically update.
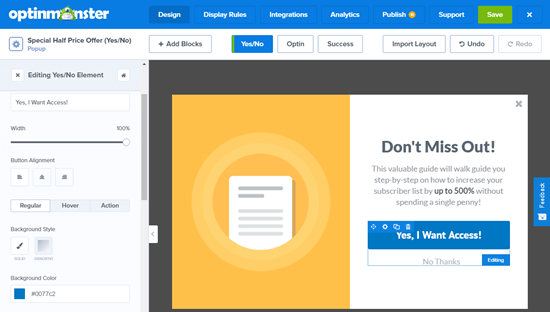
By default, clicking the ‘Yes’ button will take the user to the optin view of the campaign. Clicking the ‘No’ button will simply close the campaign.
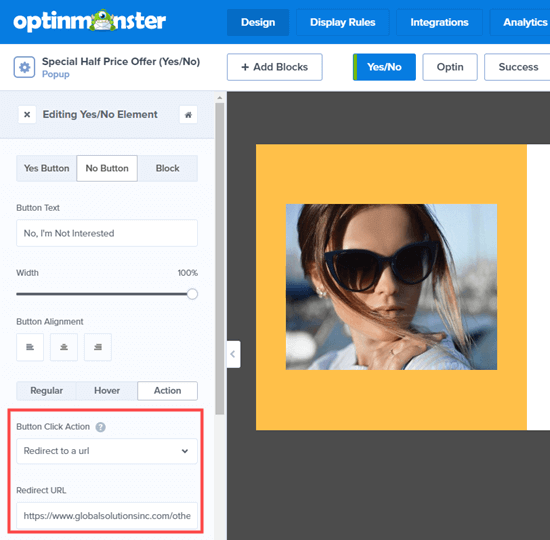
You can change these actions if you want by selecting the button then clicking the ‘Button Click Action’ dropdown. We’re going to set our ‘No’ button to redirect to a URL:
You now need to edit the optin view of your campaign. This is the view that your users will see upon clicking on the ‘Yes’ button.
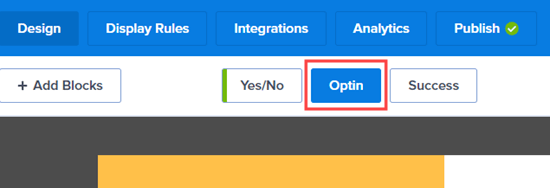
Simply click on the Optin tab at the top of the screen to edit the optin view:
Then, edit the text, image, and anything else you want to change as before.
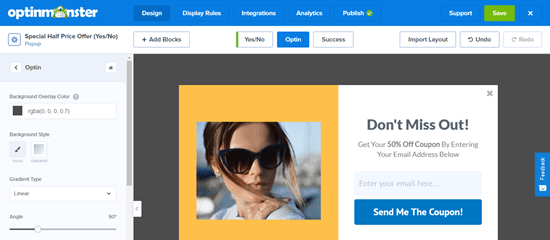
Finally, you need to change the ‘Success’ view of the campaign. This is the screen users will see after entering their email address.
First, click the Success tab at the top of the screen. Then, go ahead and click on the things you want to edit.
Here’s the finished success view for our optin:
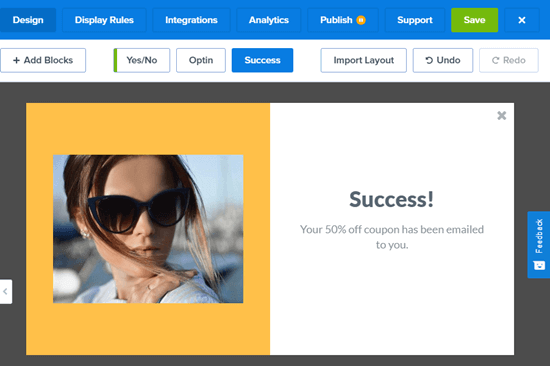
Once you’ve finished creating your optin, make sure you click the ‘Save’ button at the top of the screen.

Connecting Your Optin to Your Email List
If you’re using your optin to gather email addresses, you need to connect it with your email marketing service.
To do this, click on the Integrations tab then click the ‘Add New Integration’ button:
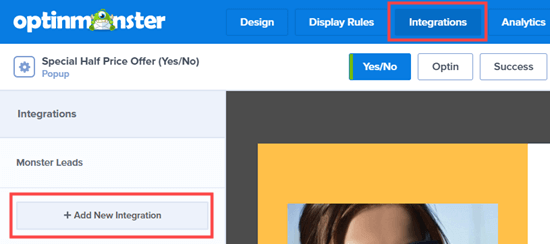
Next, select your email provider from the dropdown list. OptinMonster will then give you instructions for connecting your account to that email provider.
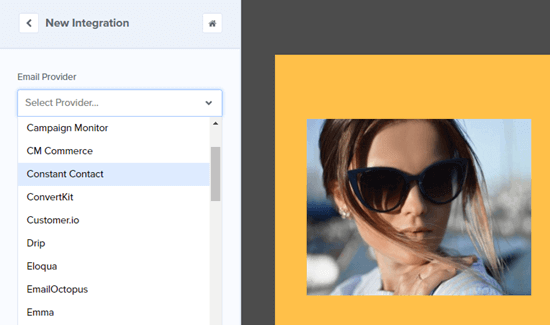
Once you’ve connected your account, go ahead and click the Display Rules tab for your campaign.
Setting the Display Rules for Your Yes/No Campaign
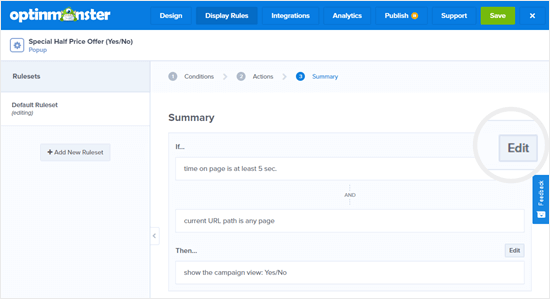
By default, your optin will appear after the user has been on any page for 5 seconds. For our optin, we’re going to give them a little longer to check out our site and products first.
To change the display rule, simply click the ‘Edit’ button on the right:
Now, go ahead and change the rule. We’re going to set the time on page to at least 15 seconds:
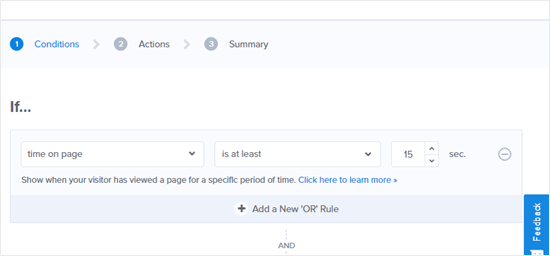
On this page, you can also select from lots of different rules. For instance, you might want to only display your Yes/No optin on a specific page, such as your pricing page.
Make sure you leave the ‘Then…’ option to ‘show the campaign view: Yes/No’ for your optin.
When you have set your display rules, click the ‘Save’ button at the top of the screen.
Putting Your Yes/No Optin Live on Your Site
Now, it’s time to make your optin live on your site.
First, you need to click the Publish tab at the top of the screen. Then, set the Status slide to the ‘Live’ instead of the ‘Paused’ setting:
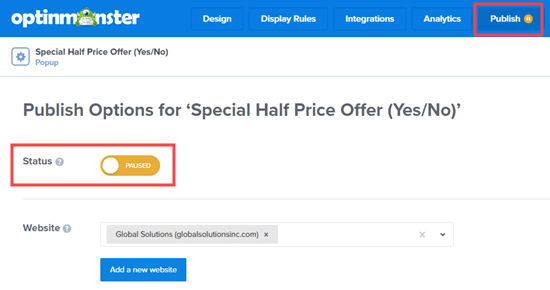
Your Yes/No optin will not be live on your site straight away. You need to put it live in WordPress too.
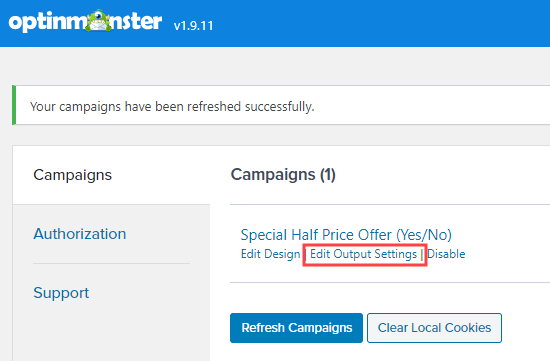
In your WordPress admin, go to OptinMonster » Campaigns then click the ‘Refresh Campaigns’ button:
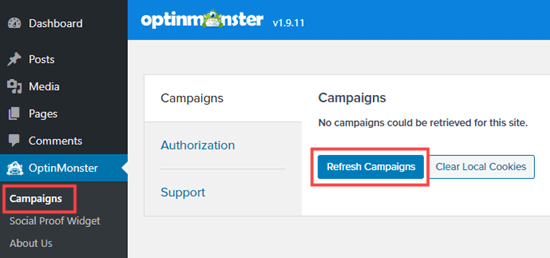
Now, you should see your campaign listed here. Go ahead and click the ‘Edit Output Settings’ link:
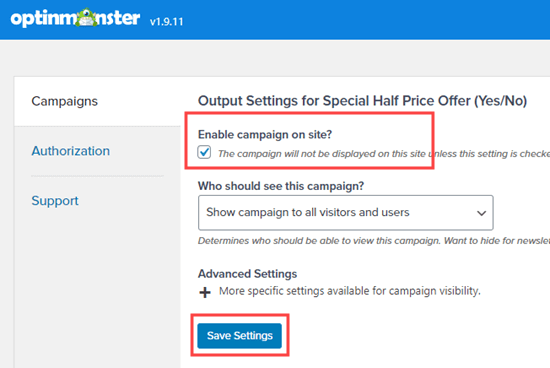
Here, you need to make sure the ‘Enable campaign on site?’ box is checked, then click the ‘Save Settings’ button:
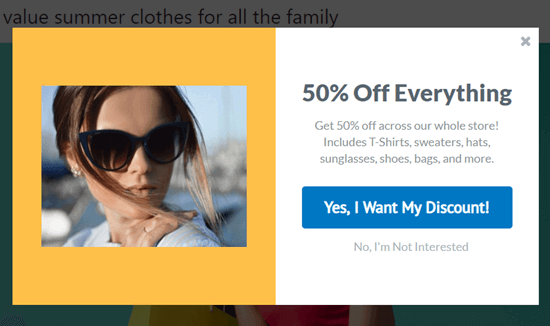
Your campaign will now be live on your website. Here is how ours looks on our demo site:

We hope this article helped you learn how to create a Yes/No optin for your WordPress site. You might also like our article on the best WordPress survey plugins to boost your user engagement, and best WordPress page builder plugins to create custom landing pages.
If you liked this article, then please subscribe to our YouTube Channel for WordPress video tutorials. You can also find us on Twitter and Facebook.
The post How to Create a Yes/No Optin for Your WordPress Site appeared first on WPBeginner.
Post a Comment